While writing my application, I encountered a lack of clear articles on how to get the user to register both via email and social networks. There were good tutorials on setting up the classic login form. There were good tutorials on OAuth2 . There was criminally little information on how to combine the two methods. During the search process, we were able to come up with a workable solution. It does not claim to be the ultimate truth, but it fulfills its function. In this article I will show how to implement a note storage service with a similar Spring Security configuration from scratch. Note: it’s good if the reader has gone through at least a couple of tutorials on Spring, because attention will be focused only on Spring Security, without detailed explanations of repositories, controllers, etc. Otherwise, an already rather large article would turn out to be gigantic. Content
Web - launching an application on the built-in Tomcat, url mappings and the like;
JPA - database connection;
Mustache is a template engine used to generate web pages;
Security - application protection. This is what this article was created for.
Download the resulting archive and unpack it in the folder you need. We launch it in the IDE. You can choose the database at your discretion. I use MySQL as the database for the project, so I add the following dependency to the pom.xml file in the <dependencies> block:
Let's create a package entitiesin which we will place the database entities. The user will be described by a class Userthat implements the interface UserDetails, which will be needed for the Spring Security configuration. The user will have an id, username (this is email), password, name, role, activity flag, Google account name and email ( googleNameand googleUsername).
To save entities to the database, we need repositories that will do all the dirty work for us. Let's create a package repos, in it we will create interfaces UserRepoinherited NoteRepofrom the interface JpaRepository<Entity, Id>.
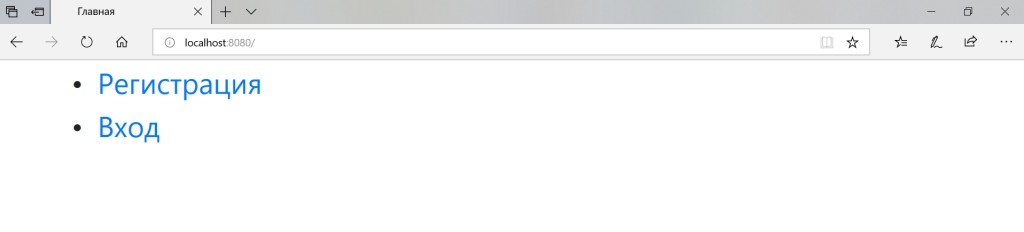
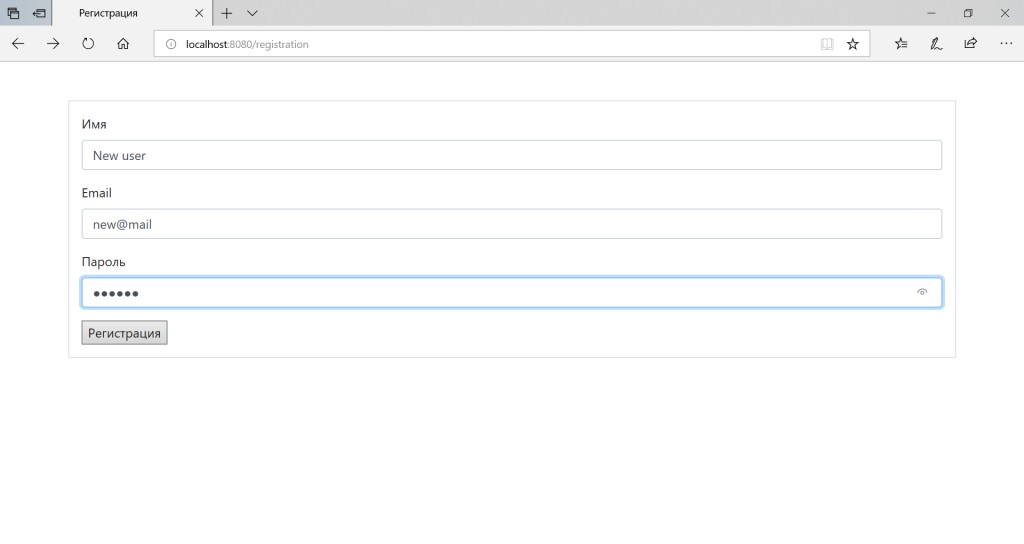
Only an authorized user should have access to the list of notes. The remaining pages are public. Let's create a package controllerscontaining a class IndexControllercontaining the usual get-mapping of the main page. The class RegistrationControlleris responsible for registering the user. Post-mapping takes data from the form, saves the user to the database and redirects to the login page. PasswordEncoderwill be described later. It is used to encrypt passwords.
The controller responsible for the notes list page currently contains simplified functionality, which will become more complex after the implementation of Spring Security.
We won't write a controller for the login page because it is used by Spring Security. Instead, we will need a special configuration. As usual, let's create another package, call it config, and place the class there MvcConfig. When we write the Spring Security configuration, it will know which page we are referring to when we use "/login".
I use the Mustache template engine to create pages . You can implement another one, it doesn’t matter. A meta.mustache file has been created for the meta information that is used on all pages. It also includes Bootstrap to make the pages of our project look prettier. Pages are created in the "src/main/resources/templates" directory. The files have the extension mustache. Placing the html code directly in the article will make it too large, so here is a link to the templates folder in the project's GitHub repository .
Configuring Spring Security for Classic Login
Spring Security helps us protect the application and its resources from unauthorized access. We will create a concise working configuration in a class SecurityConfiginherited from WebSecurityConfigurerAdapter, which we will place in the package config. Let's mark it with the @EnableWebSecurity annotation, which will enable Spring Security support, and the @Configuration annotation, which indicates that this class contains some configuration. Note: the automatically configured pom.xml contained version of the Spring Boot parent component 2.1.4.RELEASE, which prevented Security from being implemented in the established way. To avoid conflicts in the project, it is recommended to change the version to 2.0.1.RELEASE.
Allow anonymous users access to the home page, registration and login pages. All other requests must be performed by logged-in users. Let’s assign the previously described “/login” as the login page. If the login is successful, the user will be taken to a page with a list of notes; if there is an error, the user will remain on the login page. Upon successful exit, the user will be taken to the main page.
As you may have noticed, the class UserServicelocated in the package is responsible for loading the user services. In our case, it searches for a user not only by the field username, like the built-in implementation, but also by user name, Google account name and Google account email. The last two methods will be useful to us when implementing login via OAuth2. Here the class is given in an abbreviated version.
Note: do not forget to write the necessary methods in UserRepo!
Let's improve the controller
We have configured Spring Security. Now is the time to take advantage of this in your notes controller. Now each mapping will accept an additional Principal parameter, by which it will try to find the user. Why can't I directly inject the class User? Then there will be a conflict due to a mismatch of user types when we write a login through social networks. We provide the necessary flexibility in advance. Our notes controller code now looks like this:
Note: the project has CSRF protection enabled by default , so either disable it for yourself (http.csrf().disable()), or do not forget, as the author of the article, to add a hidden field with a csrf token to all post requests.
Launch
We are trying to launch the project.
We see that a new user has appeared in the database. The password is encrypted.
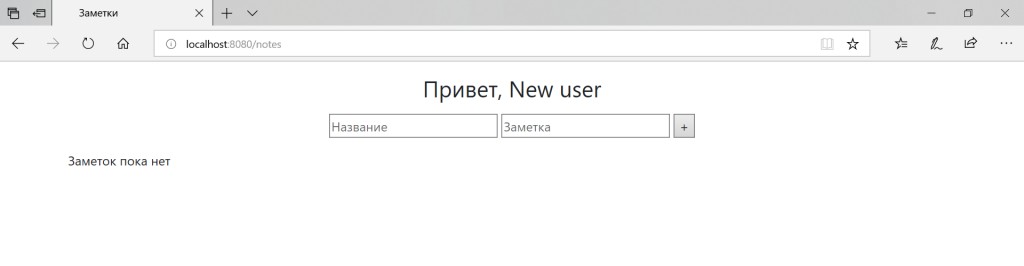
The notes are saved to the database.
We see that the project is successfully launched and running. For complete happiness, we only need the ability to log in through social networks. Well, let's get started!
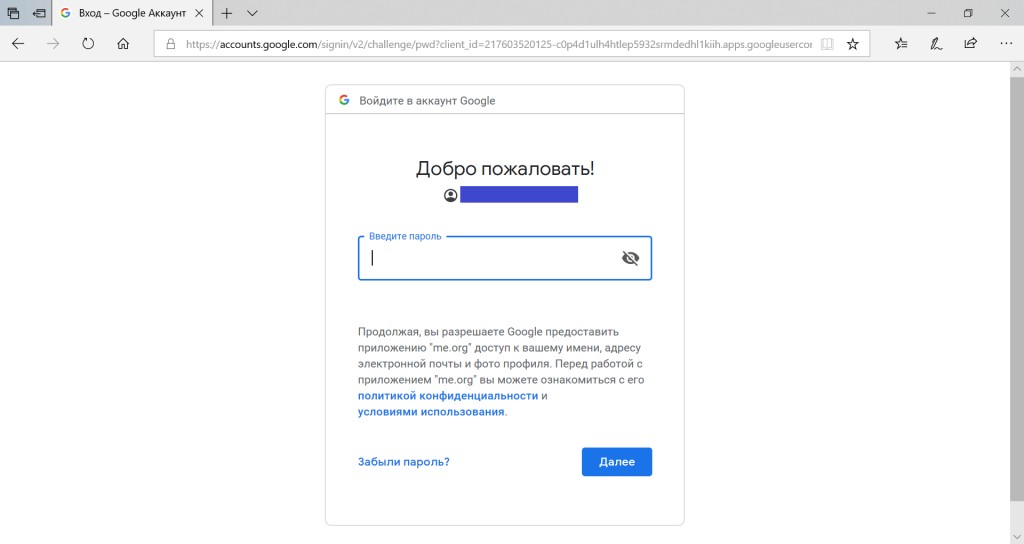
Setting up OAuth2 using Google as an example in Spring Security
Let's modify our Spring Security configuration in the SecurityConfig. First, let's add the @EnableOAuth2Client annotation. It will automatically pull up what you need to log in via social networks.
Filter configuration and application.properties
Let's inject OAuth2ClientContext to use in our security configuration.
OAuth2ClientContext is used when creating a filter that validates the user's social login request. The filter is available thanks to the @EnableOAuth2Client annotation. All we need to do is call it in the correct order, before the main Spring Security filter. Only then will we be able to catch redirects during the login process with OAuth2. To do this, we use FilterRegistrationBean, in which we set the priority of our filter to -100.
The filter also needs to know that the client has registered via Google. The @ConfigurationProperties annotation specifies which configuration properties to look for in application.properties.
Note: since Google does not want to work with the address localhost:8080, add the line “127.0.0.1 me.org” or something similar to the file C:\Windows\System32\drivers\etc\hosts at the end. The main thing is that the domain is in a classic form.
CustomUserInfoTokenServices
Did you notice the word Custom in the filter function description? Class CustomUserInfoTokenServices. Yes, we will create our own class with blackjack and the ability to save the user in the database! Using the Ctrl-N keyboard shortcut in IntelliJ IDEA, you can find and see how the UserInfoTokenServicesdefault is implemented. Let's copy its code into the newly created class CustomUserInfoTokenServices. Most of it can be left unchanged. Before changing the logic of the functions, let’s add UserRepoand as private fields of the class PasswordEncoder. Let's create setters for them. Let's add @Autowired UserRepo userRepo to the SecurityConfig class. We look at how the pointer to the error in the filter creation method disappears, and we rejoice. Why couldn't @Autowired be applied directly to CustomUserInfoTokenServices? Because this class will not pick up the dependency, since it itself is not marked with any Spring annotation, and its constructor is created explicitly when the filter is declared. Accordingly, Spring's DI mechanism does not know about it. If we annotate @Autowired on anything in this class, we will get a NullPointerException when used. But through explicit setters everything works very well. After implementing the necessary components, the main object of interest becomes the loadAuthentication function, in which the Map<String, Object> with information about the user is retrieved. It was in this project that I implemented the saving of a user logged in through a social network into the database. Since we are using a Google account as an OAuth2 provider, we check whether map contains the “sub” field that is typical for Google. If it is present, it means that the information about the user was received correctly. We create a new user and save it to the database.
@OverridepublicOAuth2AuthenticationloadAuthentication(String accessToken)throwsAuthenticationException,InvalidTokenException{Map<String,Object> map =getMap(this.userInfoEndpointUrl, accessToken);if(map.containsKey("sub")){String googleName =(String) map.get("name");String googleUsername =(String) map.get("email");User user = userRepo.findByGoogleUsername(googleUsername);if(user ==null){
user =newUser();
user.setActive(true);
user.setRoles(Collections.singleton(Role.USER));}
user.setName(googleName);
user.setUsername(googleUsername);
user.setGoogleName(googleName);
user.setGoogleUsername(googleUsername);
user.setPassword(passwordEncoder.encode("oauth2user"));
userRepo.save(user);}if(map.containsKey("error")){this.logger.debug("userinfo returned error: "+ map.get("error"));thrownewInvalidTokenException(accessToken);}returnextractAuthentication(map);}
When using several providers, you can specify different options in one CustomUserInfoTokenServices, and register different classes of similar services in the filter declaration method.
Now both User and OAuth2Authentication can act as Principal. Since we took into account in UserService in advance the loading of the user through Google data, the application will work for both types of users. We modify the project's main page controller so that it redirects users logged in using OAuth2 to the notes page.
After minor cosmetic changes and adding an exit button, we carry out the final launch of the project.
The user successfully logs in both through the regular form and through a Google account. This is what we wanted! I hope this article has cleared up some points about creating a web application, securing it with Spring Security, and combining different login methods. With the full project code you can


GO TO FULL VERSION