 Today we'll talk about the logical continuation of my article about Git . I also recommend reading the material on branching strategieswhich I posted earlier. In the article about Git, I described how to work with it on the command line, and today I will show you how to do all this in Intellij IDEA. At the beginning of my journey as a developer, I used the command line and thought that there was no need for me to use the UI for this business. After all, everything is clear and so ... But it was exactly until the moment when I started using Git in Intellij IDEA ... I want to say right away that I will describe my personal work experience. There are several options for solving the same tasks through Intellij IDEA, and if you know how to do better what I will describe in the article, write in the comments and discuss.
Required input:
- Read, repeat and understand the git article . This will help ensure that everything is already set up and ready to go.
- Install Intellij IDEA.
- Allocate an hour of personal time for complete assimilation.
Cloning the project locally
There are two options here.- If you already have a github account and want to push something later, it’s better to fork the project to yourself and clone your copy. How to fork - I described in this article in the chapter an example of the forking workflow .
- Clone from my repository and do everything locally without the ability to push the whole thing to the server. After all, this will be my repository))
-
Copy the project address:
![Making Git friends with Intellij IDEA - 2]()
-
Open Intellij IDEA and select Get from Version Control:
![Making Git friends with Intellij IDEA - 3]()
-
Copy paste the address on the project:
![Making Git friends with Intellij IDEA - 4]()
-
You will be prompted to create an Intellij IDEA project. We accept an offer:
![Making Git friends with Intellij IDEA - 5]()
-
Since there is no build system, and this is not the purpose of the article, we select Create project from existing sources :
![Making Git friends with Intellij IDEA - 6]()
-
Next, there will be such an oil painting:
![Making Git friends with Intellij IDEA - 7]() We figured out cloning, now you can look around.
We figured out cloning, now you can look around.


 We figured out cloning, now you can look around.
First look at Intellij IDEA as a git UI

 Moreover, you can see what changes have been made. Moreover, the conflict was resolved there. This IDEA also shows great. If you double-click on a file that was changed during this commit, we will see how the conflict was resolved:
 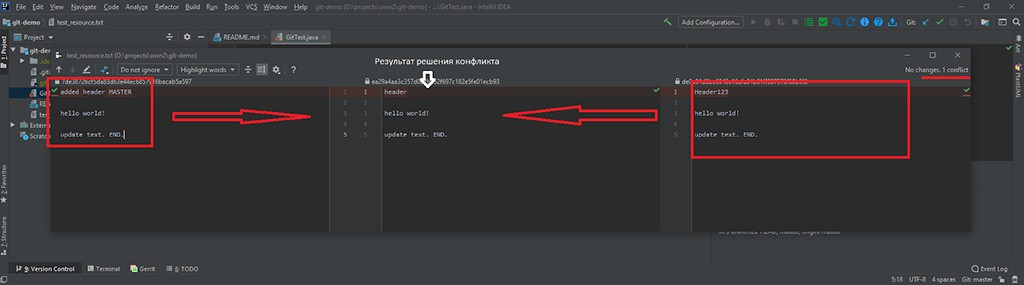 It is noticeable that on the right and on the left there were two versions of one file that needed to be merged into one. And in the middle - the result, which in the end turned out. When a project has a lot of branches, commits and users who work in the project, you need to search separately by branch (branch), user (user) and date (date): And the last thing I want to
 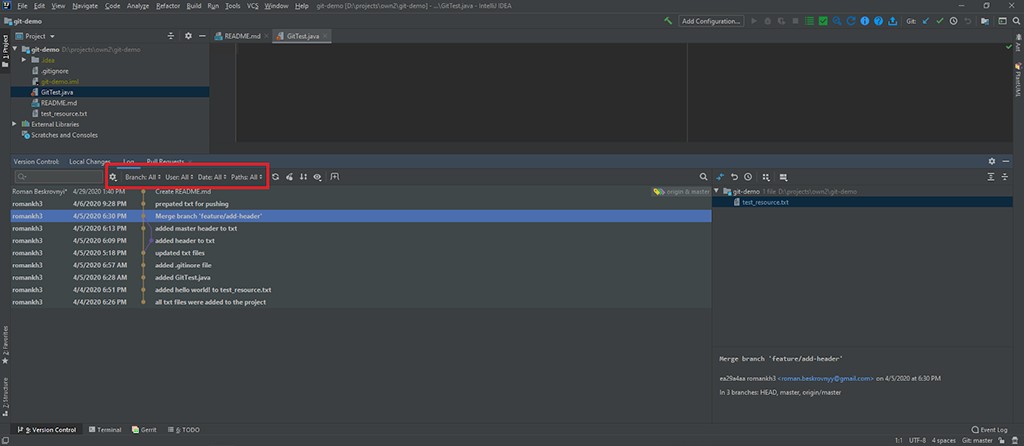 explain before starting work is how understand which branch we are in. I give you a minute to search ... did you find it? Give up? :D There is a Git button in the bottom right corner : master, where after Git: shows which branch the project is currently on. If you click on the button, you can do a lot of useful things: move to another branch, create a new one, rename an existing one, and so on.
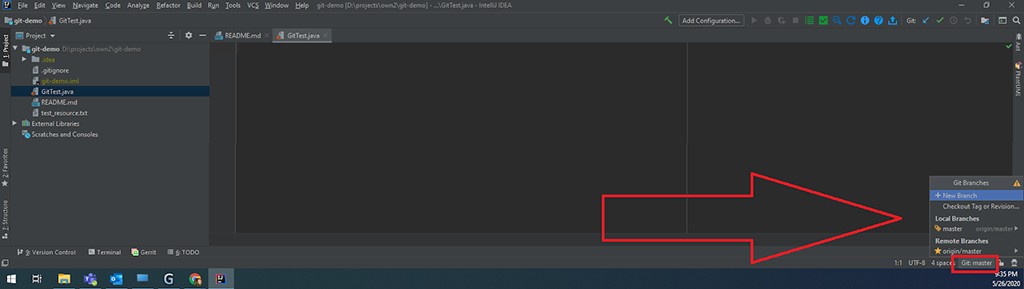
Working with the repository
Useful hotkeys
To continue working, you need to remember a few very useful hotkeys:- ctrl + t - get the latest changes from the remote repository (git pull).
- ctrl + k - commit / see all the changes that are currently. This includes both untracked and modified files (see my git article for details) (git commit).
- ctrl + shift + k is the command to push changes to a remote repository. All commits that were created locally and are not yet on the remote will be offered for push (git push).
- alt + ctrl + z - roll back changes in a specific file to the state of the last created commit in the local repository. If you select the entire project in the upper left corner, you can roll back changes to all files.

What do we want?
For us to work, we need to master the basic script that is used everywhere. The task is to implement new functionality in a separate branch and push it to a remote repository (then you need to create another pull request for the main branch, but this is beyond the scope of our article). What do I need to do?-
Get all changes so far on the master branch (master for example).
-
On the basis of this main one, create a separate one for your work.
-
Implement new functionality.
-
Switch to the master branch and check if there were any new changes while working. If not, then everything is fine, but if it was, then we do the following: go to the working branch and rebase the changes from the main branch to ours. If everything went well, then great. But there may well be conflicts. And they can just be solved in advance, without wasting time on a remote repository.
It would seem, why do it? This is a good practice that prevents conflicts from occurring after pushing your branch to the local repository (there is, of course, a chance that there will still be conflicts, but it becomes much less).
- Push your changes to the remote repository.
Get changes from remote server?
I added the description to the README with a new commit and I want to get these changes. A choice is offered between merge and rebase in case changes were made both in the local repository and on the remote one. Choose a merge. Enter ctrl + t : As a result, you can see how the README has changed, i.e. changes from the remote repository have been pulled up, and in the lower right corner you can see all the details of those changes that came from the server.
Create a new branch based on master
Everything is simple here.-
Go to the lower right corner and click on Git: master , select + New Branch .
![Making Git friends with Intellij IDEA - 15]()

We leave a checkmark Checkout branch and write the name of the new branch. For me it would be readme-improver .
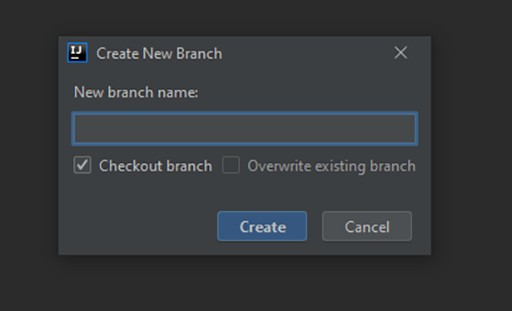
After that, Git: master will change to Git: readme-improver .
Simulating parallel work
For conflicts to appear, someone has to create them :D I'll edit the README with a new commit through the browser and thus simulate parallel work. They say someone during my work made changes in the same file as me, which will lead to a conflict. I will remove the word “completely” from line 10.Implement your functionality
The task is to change the README and add a description to the new article, that is, that the work in the git goes through Intellij IDEA. Adding this: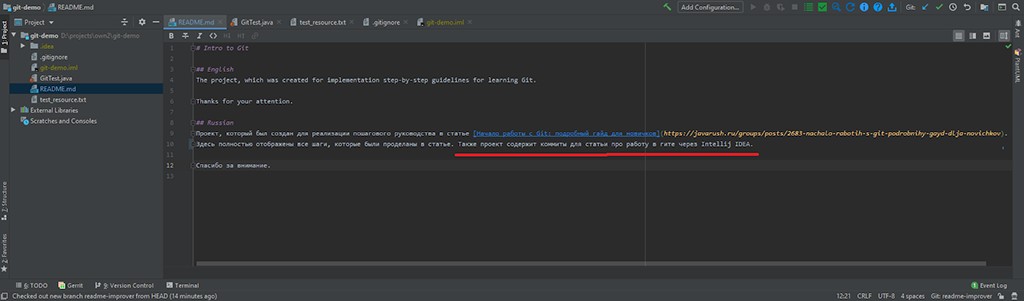 Changes made, now you can create a commit. We press the hot key ctrl + k , we get:
 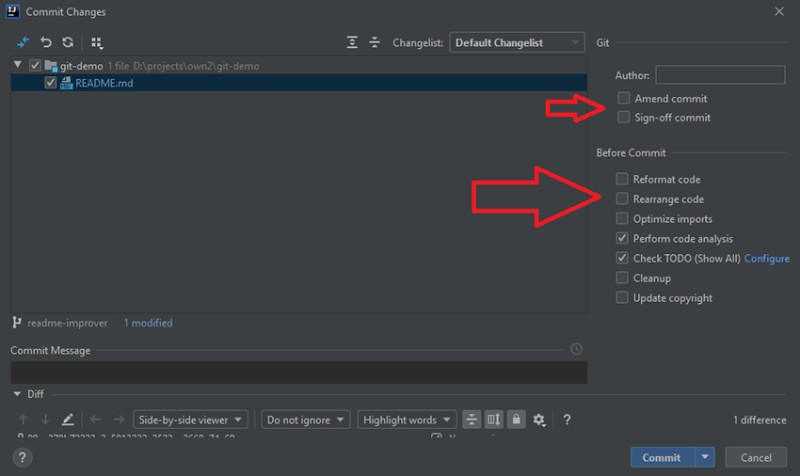 Before creating a commit, you need to carefully look at what is offered in this window. I specifically added arrows where to look. There are many interesting things there. In the Commit Message section , write the text of the commit, and in order for it to be created, you need to click the Commit button. I never found how to make it a hotkey, so if someone finds it, write, I will be very happy. We write that the README has changed and create a commit. As a result, an alert pops up in the lower left corner, in which the name of the commit will be:
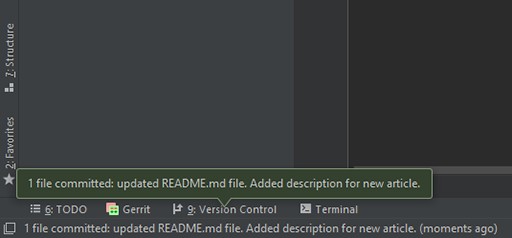
Check if master branch has changed
We completed the task, it works, the tests were written, everything is fine. But before pushing to the server, you still need to check if there have been any changes in the main branch during this time. How could this happen? Very simple: someone was given a task after you, and that someone did it faster than you. Therefore, we switch to the master branch. To do this, in the lower right corner, do what is shown in the figure below: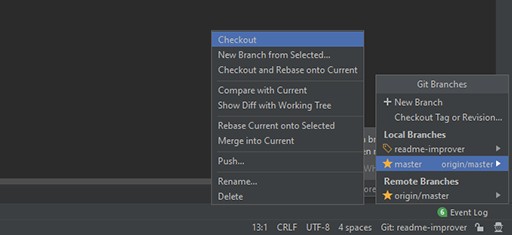 In the master branch, press ctrl + t to get its latest changes from the remote server. If you look at what the changes were, you can easily see what happened:
  As you can see, the word “completely” was removed. Perhaps it was someone from marketing who decided that this was not the way to write and gave the developers the task of updating it. We now have the latest version of the master branch locally. Let's go back toreadme-improver . Now we need to rebase the changes from the master branch to ours. Do:
 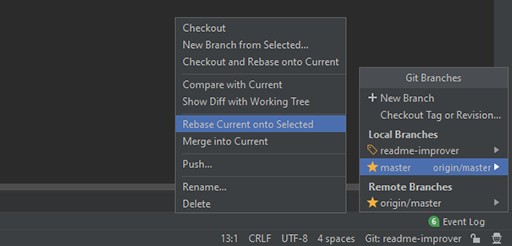 If you did everything right with me, the result should be a conflict in the README file:
 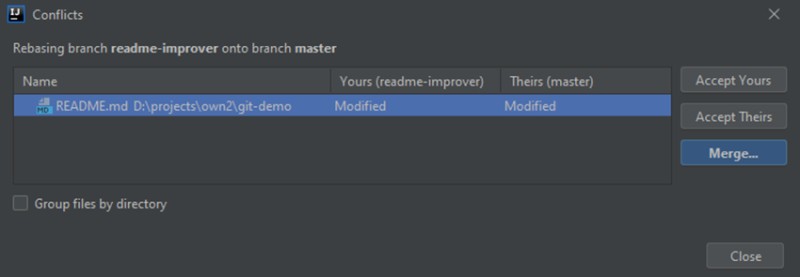 There is also a lot of information to understand and absorb. This shows a list (one element in our case) of files that have conflicts. We can choose three options:
- accept yours - accept only changes from readme-improver.
- accept theirs - accept only changes from master.
- merge - choose what to leave and what to remove.
 Here you can see that there are three parts:
- These are the changes from the readme-improver.
- Result. So far, it's the way it was before the changes.
- Changes from the master branch.
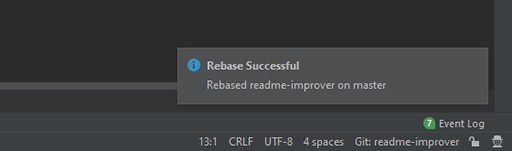 This is how we resolved our first conflict through Intellij IDEA :D
Push changes to remote server
The next step is to push the changes to the remote server and create a pull request. To do this, simply press ctrl + shift + k , after which we get: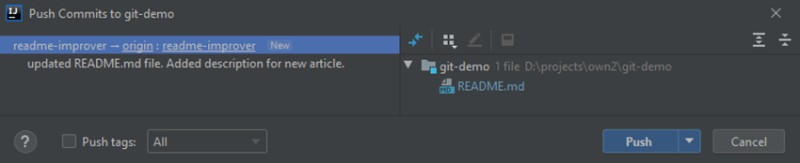 On the left there will be a list of commits that are not pushed to the remote repository, and on the right there will be all the files that have changed. And that's all: press Push , and you will be happy :) If the push is successful, there will be such a notification in the lower right corner:
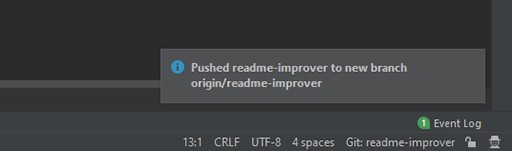
Bonus part
I did not want to initially add the creation of a pull request to the article, but it turns out not very complete because of this. Therefore, we go to the github repository (if it is yours, of course))) ) and see that the github already knows what to offer us: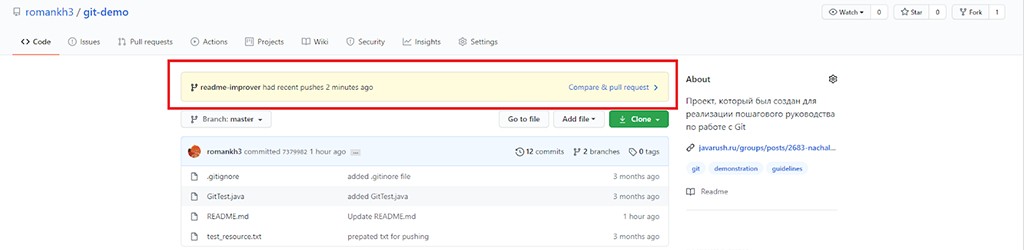 Click on Compare & pull request , then click Create pull request . Due to the fact that we resolved conflicts in advance, now when creating a pull request, you can immediately merge it:
  That's all I wanted to tell you this time. Of course, I only opened the door for you and showed you a small part. You will find the rest as needed. Traditionally, I invite you to subscribe to my GitHub account, where I post development projects on various technologies that I use at work. I recently had a personal achievement - my project has already been evaluated by more than a hundred developers. It's an incredible feeling of joy that what you've done is being used by someone. And use it to your advantage.
useful links
- CodeGym: Getting Started with Git: A Complete Beginner's Guide
- GitHub: Demo project for work
- CodeGym: Exploring Gita Branching Strategies
- JetBrains: Set up a Git Repository
- Habr: Git rebase
- GitHub: My account
GO TO FULL VERSION