Creating and Running Your First Java Application (Part 1) So, the JDK installation is complete, the package is created, the class is created, it's time to start actually writing the code... After creating the class, the corresponding HelloWorld.java file opens in the editor. Notice the package statement at the beginning of the file, as well as the class declaration. When creating a class, IntelliJ IDEA uses a template file for the Java class. (IntelliJ IDEA provides a number of predefined templates for creating different types of files. For more information, see File Templates in IntelliJ IDEA Help.) Also notice the yellow light bulb. This lamp indicates that IntelliJ IDEA has suggestions for the current context. Click on the light bulb or ALT + ENTER to see a list of available actions. At this time, we are not going to perform the actions suggested by IntelliJ IDEA (these actions are called intention actions, for more information about them, see the Intention Actions section in IntelliJ IDEA Help.) Note, however, that this IntelliJ IDEA function sometimes can be very useful. Finally, there are code folding markers next to comments. Click one of them to collapse the corresponding block if you really don't want to see that part of the code at the moment. (You can also place the cursor in the code of a block, and then press CTRL+NumPad- or CTRL+NumPad+ to collapse or expand the block. For more information on code folding, see Code Folding in IntelliJ IDEA Help.)
Writing Code for the HelloWorld Class
So, the moment has finally arrived. The final state code (as you probably know) will look like this:
The package and class declaration are already there, now let’s add the missing couple of lines. Place the cursor at the end of the current line, after the { sign, and press ENTER to start a new line (Actually, you can do it easier: regardless of the cursor position, pressing SHIFT + ENTER starts a new line, leaving the previous lines unchanged).
Using the Active Template for a MethodMain()
Line:
publicstaticvoidmain(String[] args){}
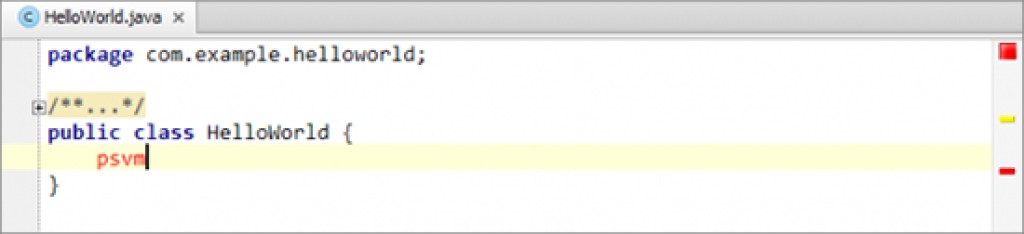
It’s quite possible to simply print it. However, I would recommend you a different method. Type: psvmand press TAB. As a result, we get: In this case, we used an active template for generating object code. An active template has an abbreviation string that defines the template (PSVM = public static void main in this example) and a key to insert the fragment into the code (TAB in this case). For more information, see the Live Templates section in IntelliJ IDEA Help.
Using code completion
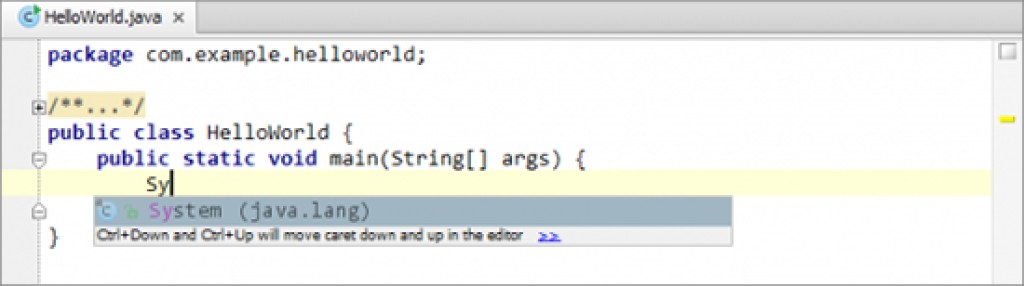
Now it's time to add the remaining lines of code ( System.out.println ("Hello, World!");). We will do this using the code completion operation in IntelliJ IDEA. We print: Sy Automatic code completion offers us options: In this case, there is only one option: System (java.lang). Press ENTER to select it. We type a period and the letter " o ": .о The automatic code completion function again offers us options: Press ENTER to select out . Typing: .printl Notice how the list of options changes as you type. The method we are looking for is Println (String х). We choose println(String x). The code takes the following form: Printing the quotes: " As you can see, the second quotes appear automatically, and the cursor moves to the place where our text should be. Type: Hello, World!The coding stage is completed.
Using the active template for Println()
By the way, we could make the call Println()using the active template. The abbreviation for the corresponding template is Sout. and the activation key is TAB. You can try using this template as an additional exercise. (If you think you have enough active templates, proceed to create a project). Remove the line:
System.out.println("Hello, World!");
Type: sout and press TAB. Line:
System.out.println();
is added automatically, and the cursor ends up in parentheses. All we have to do is print: Hello, World!
Construction project
Options for building a project or part of it are available in the Build menu . Many of these options are also available in the context menu in the Project window and in the editor for HelloWorld.java. There is also an icon on the toolbar that corresponds to the Make Project command . Now let's build the project. Construction in this particular case is simply compiling the Java source file into a class file. Thus, any of the options in the Build menu ( Make Project , Make Module 'HelloWorld' , or Compile 'HelloWorld.java' ) can be used for this purpose. Let's try to build a project. (The keyboard equivalent for this command is CTRL + F9. Note that this link appears directly in the menu as a helpful hint.) Wait for IntelliJ IDEA to finish compiling. When this process is completed, the relevant information is displayed in the status bar. Now if you go to the output module folder (default is the folder
\out\production\
, in our case, and the folder
And
называются HelloWorld), вы увидите там структуру папок для пакета com.example.helloworld и HelloWorld.class файл в папке HelloWorld.
Если вы хотите разобраться в строительстве applications лучше, обратитесь к разделам IntelliJ IDEA Help:
Build Process,
Compilation Types,
Configuring Module Compiler Output и
Configuring Project Compiler Output.
Запуск applications.
Приложение IntelliJ IDEA выполняются согласно тому, что называется конфигурацией запуска/отладки (Run/Debug). Такая конфигурация, How правило, должна быть создана до запуска applications. (Более подробную информацию см. в разделе
Running, Debugging and Testing в IntelliJ IDEA Help.) В случае класса HelloWorld, нет необходимости создавать конфигурацию запуска и отладки заранее.Класс содержит метод
main(). Такие классы могут быть запущены сразу, прямо из редактора. Для этой цели существует команда
Run ‘<ClаssName>.main()’ в контекстном меню для класса. Таким образом, чтобы запустить класс, щелкните правой кнопкой мыши где-нибудь в области редактирования и выберите
Run 'HellоWorld.main ()'.
В результате выполнения команды Run появляется окно в нижней части экрана. Оно окна отвечает за отображение всех выходных данных, указанных в конфигурации команды. (Более подробную информацию см. в разделе
Run Tool Window, в справке IntelliJ IDEA.)
Первая строка в окне содержит командную строку IntelliJ IDEA, используемую для запуска класса, включая все опции и аргументы. Последняя строка показывает, что процесс завершился нормально, бесконечных циклов не произошло. И, наконец, вы видите вывод программы Hello, World! между этими двумя строками. На этом этапе наше упражнение закончено. Однако, есть заключительные замечания, которые стоит сделать, связанные с запуском приложений IntelliJ IDEA:
Варианты для запуска приложений можно найти в главном меню.
Большинство имен команд в этом меню говорят сами за себя. Опция редактирования конфигурации запуска открывает диалоговое окно для создания и редактирования конфигураций запуска. Также отметим, что сочетания клавиш (см. справа в меню) доступны для большинства команд.
На главной панели инструментов есть область, содержащая кнопки, связанные с запуском приложений. К ним относятся кнопки выбора конфигурации запуска и отладки (Run/Debug) и значки для запуска приложений в различных режимах.
Выбор конфигурации позволяет выбрать Run/Debug конфигурации, которые вы хотите использовать. Он также позволяет получить доступ к настройке Run/Debug конфигурации (Edit Configurations) и выполнения других задач, связанных с работой функций Run/Debug. (В результате запуска класса HelloWorld, Run/Debug конфигурация HelloWorld была сохранена How временная. Теперь вы можете сохранить эту конфигурацию запуска (Save Configuration "HelloWorld"), чтобы превратить ее в постоянную.)
Options for launching applications and for working with Run/Debug configurations, if necessary, are also present as context menu commands in the Project window .
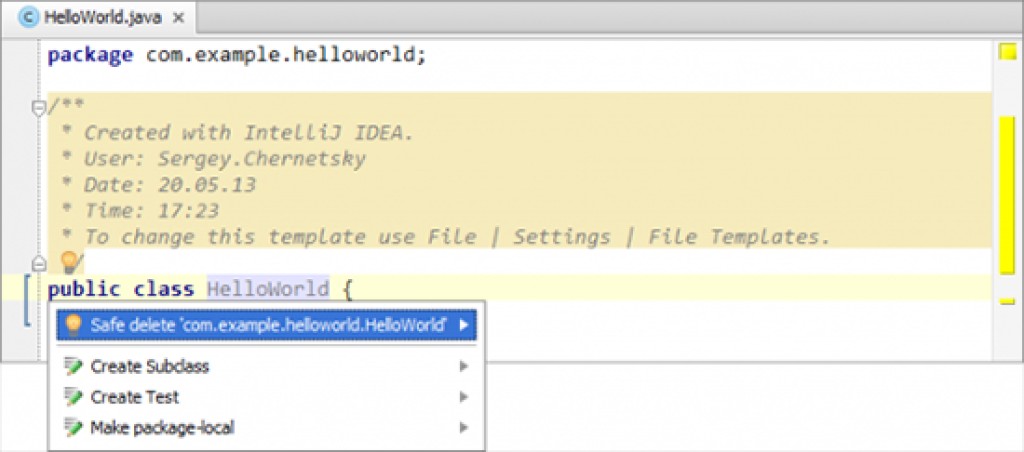 At this time, we are not going to perform the actions suggested by IntelliJ IDEA (these actions are called intention actions, for more information about them, see the Intention Actions section in IntelliJ IDEA Help.) Note, however, that this IntelliJ IDEA function sometimes can be very useful. Finally, there are code folding markers next to comments. Click one of them to collapse the corresponding block if you really don't want to see that part of the code at the moment. (You can also place the cursor in the code of a block, and then press CTRL+NumPad- or CTRL+NumPad+ to collapse or expand the block. For more information on code folding, see Code Folding in IntelliJ IDEA Help.)
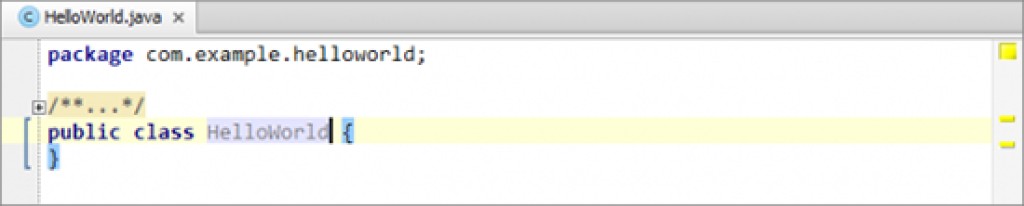


 and press TAB. As a result, we get:
 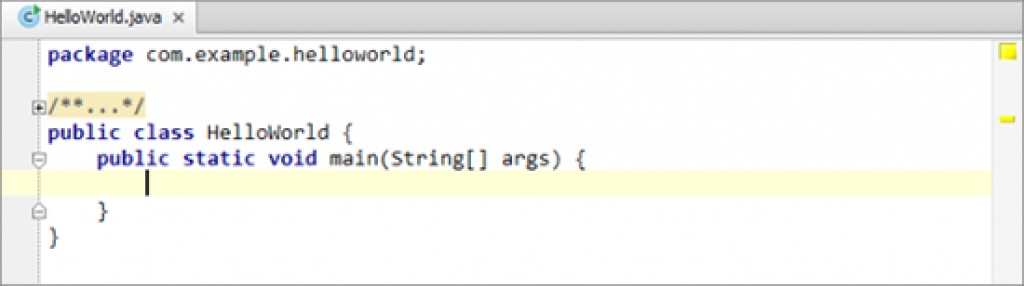 In this case, we used an active template for generating object code. An active template has an abbreviation string that defines the template (PSVM = public static void main in this example) and a key to insert the fragment into the code (TAB in this case). For more information, see the Live Templates section in IntelliJ IDEA Help.
 In this case, there is only one option:
 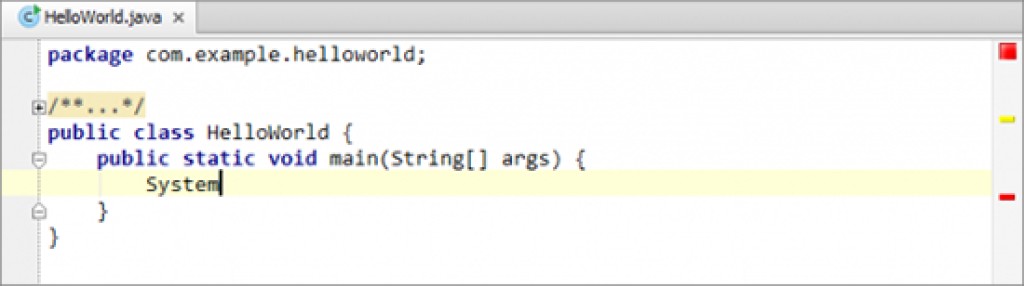 We type a period and the letter " o ":
  Press ENTER to select out .
  Typing:
 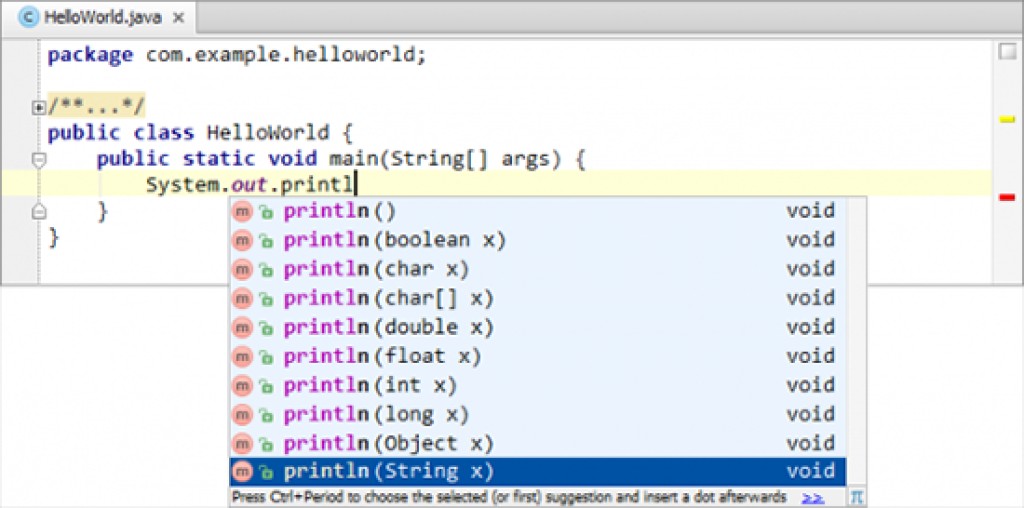 We choose
 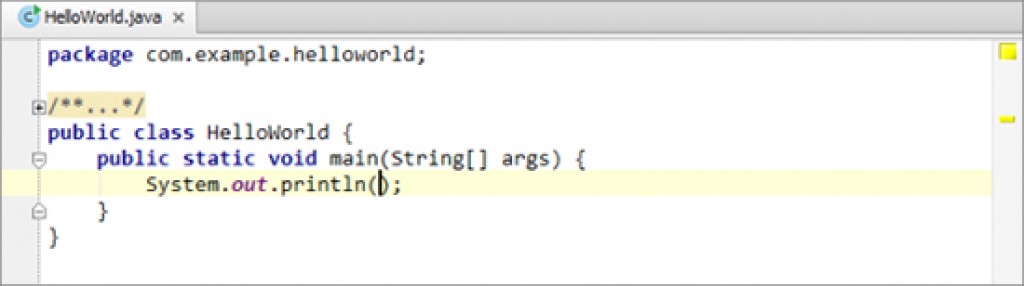 Printing the quotes:
  The coding stage is completed.
 Many of these options are also available in the context menu in the Project window and in the editor for HelloWorld.java. There is also an icon on the toolbar that corresponds to the Make Project command . Now let's build the project. Construction in this particular case is simply compiling the Java source file into a class file. Thus, any of the options in the Build menu ( Make Project , Make Module 'HelloWorld' , or Compile 'HelloWorld.java' ) can be used for this purpose. Let's try to build a project. (The keyboard equivalent for this command is CTRL + F9. Note that this link appears directly in the menu as a helpful hint.) Wait for IntelliJ IDEA to finish compiling. When this process is completed, the relevant information is displayed in the status bar.
  Now if you go to the output module folder (default is the folder
 Если вы хотите разобраться в строительстве applications лучше, обратитесь к разделам IntelliJ IDEA Help:
Build Process,
Compilation Types,
Configuring Module Compiler Output и
Configuring Project Compiler Output.
Если вы хотите разобраться в строительстве applications лучше, обратитесь к разделам IntelliJ IDEA Help:
Build Process,
Compilation Types,
Configuring Module Compiler Output и
Configuring Project Compiler Output.
 В результате выполнения команды Run появляется окно в нижней части экрана. Оно окна отвечает за отображение всех выходных данных, указанных в конфигурации команды. (Более подробную информацию см. в разделе
Run Tool Window, в справке IntelliJ IDEA.)
В результате выполнения команды Run появляется окно в нижней части экрана. Оно окна отвечает за отображение всех выходных данных, указанных в конфигурации команды. (Более подробную информацию см. в разделе
Run Tool Window, в справке IntelliJ IDEA.)
 Первая строка в окне содержит командную строку IntelliJ IDEA, используемую для запуска класса, включая все опции и аргументы. Последняя строка показывает, что процесс завершился нормально, бесконечных циклов не произошло. И, наконец, вы видите вывод программы Hello, World! между этими двумя строками. На этом этапе наше упражнение закончено. Однако, есть заключительные замечания, которые стоит сделать, связанные с запуском приложений IntelliJ IDEA:
 Большинство имен команд в этом меню говорят сами за себя. Опция редактирования конфигурации запуска открывает диалоговое окно для создания и редактирования конфигураций запуска. Также отметим, что сочетания клавиш (см. справа в меню) доступны для большинства команд.
 Выбор конфигурации позволяет выбрать Run/Debug конфигурации, которые вы хотите использовать. Он также позволяет получить доступ к настройке Run/Debug конфигурации (Edit Configurations) и выполнения других задач, связанных с работой функций Run/Debug. (В результате запуска класса HelloWorld, Run/Debug конфигурация HelloWorld была сохранена How временная. Теперь вы можете сохранить эту конфигурацию запуска (Save Configuration "HelloWorld"), чтобы превратить ее в постоянную.)

GO TO FULL VERSION