アプリケーションを作成しているときに、電子メールとソーシャル ネットワークの両方でユーザーを登録させる方法に関する明確な記事が不足していることに気づきました。クラシックなログインフォームの設定に関する優れたチュートリアルがありました。OAuth2に関する優れたチュートリアルがありました。2 つの方法を組み合わせる方法に関する情報は犯罪的にほとんどありませんでした。検索プロセス中に、実行可能な解決策を見つけることができました。それは究極の真実であるとは主張しませんが、その機能は果たします。この記事では、同様の Spring Security 構成を使用してメモ ストレージ サービスを最初から実装する方法を説明します。 ![Notes サービスの例を使用して、メールと OAuth2 による定期ログインを Spring Security に導入してみましょう - 1]() 注:読者が Spring に関する少なくとも 2 つのチュートリアルを読んでいるとよいでしょう。そうしないと、リポジトリやコントローラなどの詳細な説明がなく、Spring Security のみに注目してしまうからです。そうでない場合は、すでにかなり大きな記事になってしまいます。巨大になる。 コンテンツ
注:読者が Spring に関する少なくとも 2 つのチュートリアルを読んでいるとよいでしょう。そうしないと、リポジトリやコントローラなどの詳細な説明がなく、Spring Security のみに注目してしまうからです。そうでない場合は、すでにかなり大きな記事になってしまいます。巨大になる。 コンテンツ
![Java-университет]()
![Notes サービスの例を使用して、メールと OAuth2 による定期ログインを Spring Security に導入してみましょう - 1]()
![Notes サービスの例を使用して、メールと OAuth2 による定期ログインを Spring Security に導入してみましょう - 2]() 新しいユーザーがデータベースに出現したことがわかります。パスワードは暗号化されています。
新しいユーザーがデータベースに出現したことがわかります。パスワードは暗号化されています。
![Notes サービスの例を使用して、メールと OAuth2 による定期ログインを Spring Security に導入してみましょう - 3]()
![Notes サービスの例を使用して、メールと OAuth2 による定期ログインを Spring Security に導入してみましょう - 4]()
![Notes サービスの例を使用して、メールと OAuth2 による定期ログインを Spring Security に導入してみましょう - 5]()
![Notes サービスの例を使用して、メールと OAuth2 による定期ログインを Spring Security に導入してみましょう - 6]() メモはデータベースに保存されます。
メモはデータベースに保存されます。
![Notes サービスの例を使用して、メールと OAuth2 による定期ログインを Spring Security に導入してみましょう - 7]() プロジェクトが正常に起動され、実行されていることがわかります。完全に幸せになるために必要なのは、ソーシャル ネットワーク経由でログインする機能だけです。さあ、始めましょう!
これで、User と OAuth2Authentication の両方がプリンシパルとして機能できるようになります。UserService では Google データを介したユーザーの読み込みを事前に考慮しているため、アプリケーションは両方のタイプのユーザーに対して機能します。OAuth2 を使用してログインしたユーザーをノート ページにリダイレクトするように、プロジェクトのメイン ページ コントローラーを変更します。
プロジェクトが正常に起動され、実行されていることがわかります。完全に幸せになるために必要なのは、ソーシャル ネットワーク経由でログインする機能だけです。さあ、始めましょう!
これで、User と OAuth2Authentication の両方がプリンシパルとして機能できるようになります。UserService では Google データを介したユーザーの読み込みを事前に考慮しているため、アプリケーションは両方のタイプのユーザーに対して機能します。OAuth2 を使用してログインしたユーザーをノート ページにリダイレクトするように、プロジェクトのメイン ページ コントローラーを変更します。
![Notes サービスの例を使用して、メールと OAuth2 による定期ログインを Spring Security に導入してみましょう - 8]()
![Notes サービスの例を使用して、メールと OAuth2 による Spring Security への定期ログインを導入してみましょう - 9]()
![Notes サービスの例を使用して、メールと OAuth2 による定期ログインを Spring Security に導入してみましょう - 10]()
![Notes サービスの例を使用して、メールと OAuth2 による定期ログインを Spring Security に導入してみましょう - 11]()
![Notes サービスの例を使用して、メールと OAuth2 による定期ログインを Spring Security に導入してみましょう - 12]()
![Notes サービスの例を使用して、Spring Security にメールと OAuth2 による定期ログインを導入してみましょう - 13]()
![Notes サービスの例を使用して、メールと OAuth2 による定期ログインを Spring Security に導入してみましょう - 14]()
![Notes サービスの例を使用して、Spring Security にメールと OAuth2 による定期ログインを導入してみましょう - 15]() ユーザーは、通常のフォームと Google アカウントの両方を介して正常にログインします。これこそ私たちが望んでいたものです!この記事で、Web アプリケーションの作成、Spring Security による保護、さまざまなログイン方法の組み合わせに関するいくつかの点が理解できたことを願っています。完全なプロジェクト コードを使用すると、次のことが可能になります
ユーザーは、通常のフォームと Google アカウントの両方を介して正常にログインします。これこそ私たちが望んでいたものです!この記事で、Web アプリケーションの作成、Spring Security による保護、さまざまなログイン方法の組み合わせに関するいくつかの点が理解できたことを願っています。完全なプロジェクト コードを使用すると、次のことが可能になります
- プロジェクトの作成
- エンティティとアプリケーション ロジックの作成
- クラシック ログイン用の Spring Security の構成
- Spring Security の例として Google を使用して OAuth2 を設定する
- フィルター設定と application.properties
- Google Cloud Platform へのアプリケーションの登録のハイライト
- CustomUserInfoTokenServices
- プロジェクトの最終始動
プロジェクトの作成
start.spring.ioに移動し、プロジェクトの基礎を形成します。- Web - 組み込み Tomcat、URL マッピングなどでアプリケーションを起動します。
- JPA - データベース接続。
- Mustache は、Web ページの生成に使用されるテンプレート エンジンです。
- セキュリティ - アプリケーションの保護。この記事はそのために作成されました。
<dependency>
     <groupId>mysql</groupId>
     <artifactId>mysql-connector-java</artifactId>
     <version>5.1.34</version>
</dependency>spring.datasource.url=jdbc:mysql://localhost:3306/springsectut?createDatabaseIfNotExist=true&useSSL=false&autoReconnect=true&useLegacyDatetimeCode=false&serverTimezone=UTC&useUnicode=yes&characterEncoding=UTF-8
spring.datasource.driver-class-name=com.mysql.jdbc.Driver
spring.datasource.username=yourUsername
spring.datasource.password=yourPassword
spring.jpa.generate-ddl=true
spring.jpa.hibernate.ddl-auto=update
spring.jpa.properties.connection.characterEncoding=utf-8
spring.jpa.properties.connection.CharSet=utf-8
spring.jpa.properties.connection.useUnicode=true
spring.mustache.expose-request-attributes=trueエンティティとアプリケーション ロジックの作成
エンティティ
entitiesデータベース エンティティを配置するパッケージを作成しましょう。ユーザーは、Spring Security 構成に必要なUserインターフェースを実装するクラスによって記述されます。UserDetailsユーザーには、ID、ユーザー名 (これは電子メールです)、パスワード、名前、役割、アクティビティ フラグ、Google アカウント名、電子メール (googleNameおよびgoogleUsername) があります。
@Entity
@Table(name = "user")
public class User implements UserDetails
{
  @Id
  @GeneratedValue(strategy = GenerationType.AUTO)
  private Long id;

  private String username;
  private String password;
  private String name;
  private boolean active;
  private String googleName;
  private String googleUsername;

  @ElementCollection(targetClass = Role.class, fetch = FetchType.EAGER)
  @CollectionTable(name = "user_role", joinColumns = @JoinColumn(name = "user_id"))
  @Enumerated(EnumType.STRING)
  private Set<Role> roles;

    //Геттеры, сеттеры, toString(), equals(), hashcode(), имплементация UserDetails
}public enum Role implements GrantedAuthority
{
USER;
@Override
public String getAuthority()
{
return name();
}
}@Entity
@Table(name = "note")
public class Note
{
@Id
@GeneratedValue(strategy = GenerationType.AUTO)
private Long id;
private String title;
private String note;
private Long userId;
//Геттеры, сеттеры, toString(), equals(), hashcode()
}リポジトリ
エンティティをデータベースに保存するには、面倒な作業をすべて実行してくれるリポジトリが必要です。パッケージを作成しましょう。その中に、インターフェースから継承したreposインターフェースを作成します。 UserRepoNoteRepoJpaRepository<Entity, Id>

@Service
@Repository
public interface UserRepo extends JpaRepository<User, Long>
{}

@Service
@Repository
public interface NoteRepo extends JpaRepository<Note, Long>
{
  List<Note> findByUserId(Long userId);
}
コントローラー
メモ サービスには次のページがあります。- 家;
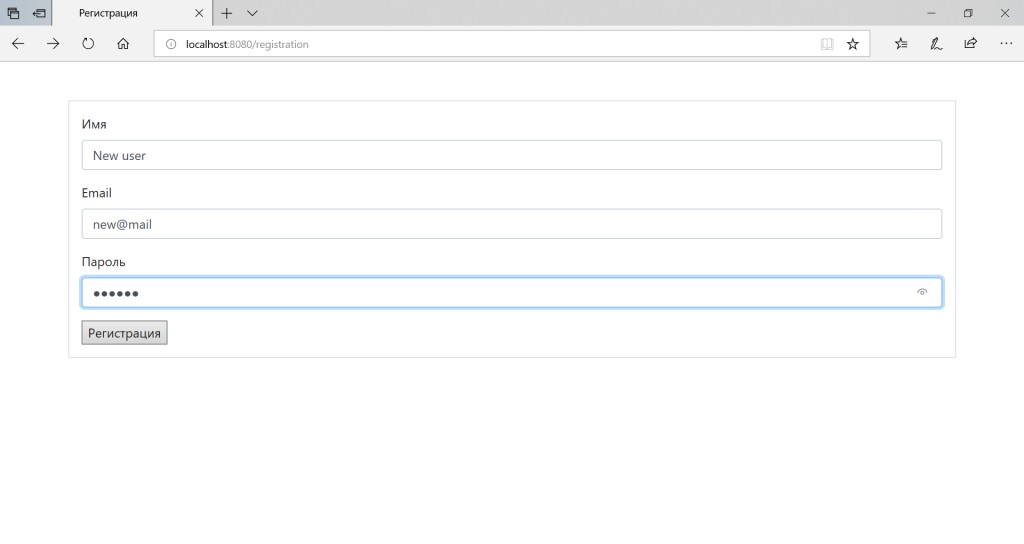
- 登録;
- 入り口;
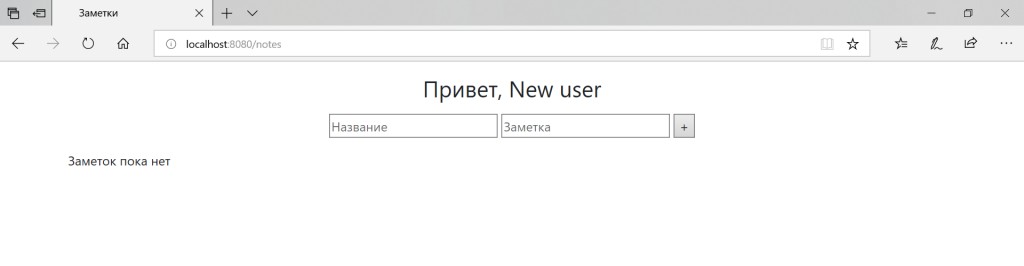
- ユーザーノートのリスト。
controllersクラスを含むパッケージを作成しましょう。IndexControllerクラスはRegistrationControllerユーザーの登録を担当します。ポストマッピングはフォームからデータを取得し、ユーザーをデータベースに保存して、ログイン ページにリダイレクトします。PasswordEncoderについては後述します。パスワードを暗号化するために使用されます。
@Controller
public class RegistrationController
{
  @Autowired
  private UserRepo userRepo;

  @Autowired
  private PasswordEncoder passwordEncoder;

  @GetMapping("/registration")
  public String registration()
  {
     return "registration";
  }

  @PostMapping("/registration")
  public String addUser(String name, String username, String password)
  {
     User user = new User();
     user.setName(name);
     user.setUsername(username);
     user.setPassword(passwordEncoder.encode(password));
     user.setActive(true);
     user.setRoles(Collections.singleton(Role.USER));

     userRepo.save(user);

     return "redirect:/login";
}@Controller
public class NoteController
{
@Autowired
private NoteRepo noteRepo;
@GetMapping("/notes")
public String notes(Model model)
{
List<Note> notes = noteRepo.findAll();
model.addAttribute("notes", notes);
return "notes";
}
@PostMapping("/addnote")
public String addNote(String title, String note)
{
Note newNote = new Note();
newNote.setTitle(title);
newNote.setNote(note);
noteRepo.save(newNote);
return "redirect:/notes";
}
}config、そこにクラスを配置しましょうMvcConfig。Spring Security 構成を作成すると、「/login」を使用するときにどのページを参照しているのかがわかります。
@Configuration
public class MvcConfig implements WebMvcConfigurer
{
  public void addViewControllers(ViewControllerRegistry registry)
  {
     registry.addViewController("/login").setViewName("login");
     registry.setOrder(Ordered.HIGHEST_PRECEDENCE);
  }
}
ページ
ページの作成にはMustache テンプレート エンジンを使用します。別のものを実装しても構いません。すべてのページで使用されるメタ情報として、meta.mustache ファイルが作成されています。プロジェクトのページをより美しく見せるための Bootstrap も含まれています。ページは「src/main/resources/templates」ディレクトリに作成されます。ファイルの拡張子は「mustache」です。HTML コードを記事内に直接配置するとサイズが大きくなりすぎるため、プロジェクトの GitHub リポジトリ内のテンプレート フォルダーへのリンクをここに示します。クラシック ログイン用の Spring Security の構成
Spring Security は、アプリケーションとそのリソースを不正アクセスから保護するのに役立ちます。SecurityConfigから継承したクラスに簡潔な作業設定を作成しWebSecurityConfigurerAdapter、それをパッケージに配置しますconfig。Spring Security サポートを有効にする @EnableWebSecurity アノテーションと、このクラスに何らかの構成が含まれていることを示す @Configuration アノテーションを付けてマークしましょう。 注:自動的に構成された pom.xml には、Spring Boot 親コンポーネント 2.1.4.RELEASE のバージョンが含まれていたため、確立された方法でセキュリティを実装できませんでした。プロジェクト内の競合を避けるために、バージョンを 2.0.1.RELEASE に変更することをお勧めします。
基本構成 SecurityConfig
私たちの構成では次のことが可能になります。-
以下を使用してパスワードを暗号化します
BCryptPasswordEncoder。@Autowired private PasswordEncoder passwordEncoder; @Bean PasswordEncoder passwordEncoder() { PasswordEncoder passwordEncoder = new BCryptPasswordEncoder(); return passwordEncoder; } -
特別に作成された認証プロバイダーを使用してログインします。
@Autowired private AuthProvider authProvider; @Override protected void configure(AuthenticationManagerBuilder auth) { auth.authenticationProvider(authProvider); } -
匿名ユーザーがホームページ、登録ページ、ログイン ページにアクセスできるようにします。他のすべてのリクエストは、ログインしたユーザーが実行する必要があります。先ほど説明した「/login」をログインページとして割り当てましょう。ログインが成功すると、ユーザーはメモのリストが記載されたページに移動しますが、エラーが発生した場合、ユーザーはログイン ページに残ります。正常に終了すると、ユーザーはメイン ページに移動します。
@Override
protected void configure(HttpSecurity http) throws Exception
{
  http
        .authorizeRequests()
        .antMatchers("/resources/**", "/", "/login**", "/registration").permitAll()
        .anyRequest().authenticated()
        .and().formLogin().loginPage("/login")
        .defaultSuccessUrl("/notes").failureUrl("/login?error").permitAll()
        .and().logout().logoutSuccessUrl("/").permitAll();
}
カスタム ユーザー ログイン
自分で作成したものでは、AuthProviderユーザーは電子メールだけでなくユーザー名でもログインできます。
@Component
public class AuthProvider implements AuthenticationProvider
{
  @Autowired
  private UserService userService;

  @Autowired
  private PasswordEncoder passwordEncoder;

  public Authentication authenticate(Authentication authentication) throws AuthenticationException
  {
     String username = authentication.getName();
     String password = (String) authentication.getCredentials();

     User user = (User) userService.loadUserByUsername(username);

     if(user != null && (user.getUsername().equals(username) || user.getName().equals(username)))
     {
        if(!passwordEncoder.matches(password, user.getPassword()))
        {
           throw new BadCredentialsException("Wrong password");
        }

        Collection<? extends GrantedAuthority> authorities = user.getAuthorities();

        return new UsernamePasswordAuthenticationToken(user, password, authorities);
     }
     else
        throw new BadCredentialsException("Username not found");
  }

  public boolean supports(Class<?> arg)
  {
     return true;
  }
}UserServiceパッケージ内にあるクラスは user をロードする役割を果たしますservices。usernameこの例では、組み込み実装のようにフィールドによってユーザーを検索するだけでなく、ユーザー名、Google アカウント名、Google アカウントの電子メールによってもユーザーを検索します。最後の 2 つの方法は、OAuth2 経由でログインを実装するときに役立ちます。ここでは、クラスは短縮版で提供されます。
@Service
public class UserService implements UserDetailsService
{
  @Autowired
  private UserRepo userRepo;

  @Override
  public UserDetails loadUserByUsername(String username) throws UsernameNotFoundException
  {
     User userFindByUsername = userRepo.findByUsername(username);
     //Остальные поиски

     if(userFindByUsername != null)
     {
        return userFindByUsername;
     }
     //Остальные проверки
     return null;
  }
}UserRepo。
コントローラーを改良してみよう
Spring Securityを構成しました。ノート コントローラーでこれを活用するときが来ました。これで、各マッピングは追加のプリンシパル パラメータを受け入れるようになり、それによってユーザーの検索が試行されます。クラスを直接注入できないのはなぜですかUser? その場合、ソーシャル ネットワーク経由でログインを作成するときに、ユーザー タイプの不一致により競合が発生します。事前に必要な柔軟性を提供します。Notes コントローラーのコードは次のようになります。
@GetMapping("/notes")
public String notes(Principal principal, Model model)
{
  User user = (User) userService.loadUserByUsername(principal.getName());
  List<Note> notes = noteRepo.findByUserId(user.getId());
  model.addAttribute("notes", notes);
  model.addAttribute("user", user);

  return "notes";
}

@PostMapping("/addnote")
public String addNote(Principal principal, String title, String note)
{
  User user = (User) userService.loadUserByUsername(principal.getName());

  Note newNote = new Note();
  newNote.setTitle(title);
  newNote.setNote(note);
  newNote.setUserId(user.getId());

  noteRepo.save(newNote);

  return "redirect:/notes";
}打ち上げ
私たちはプロジェクトを立ち上げようとしています。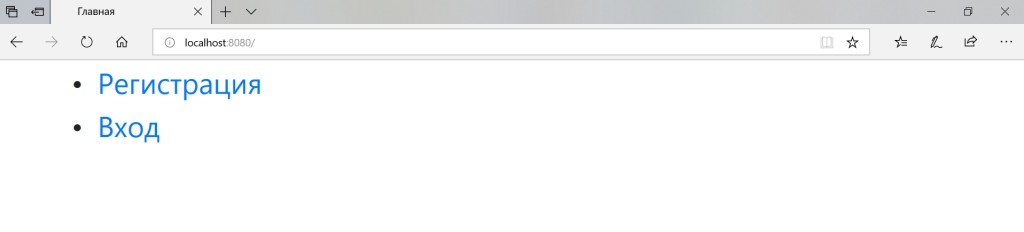


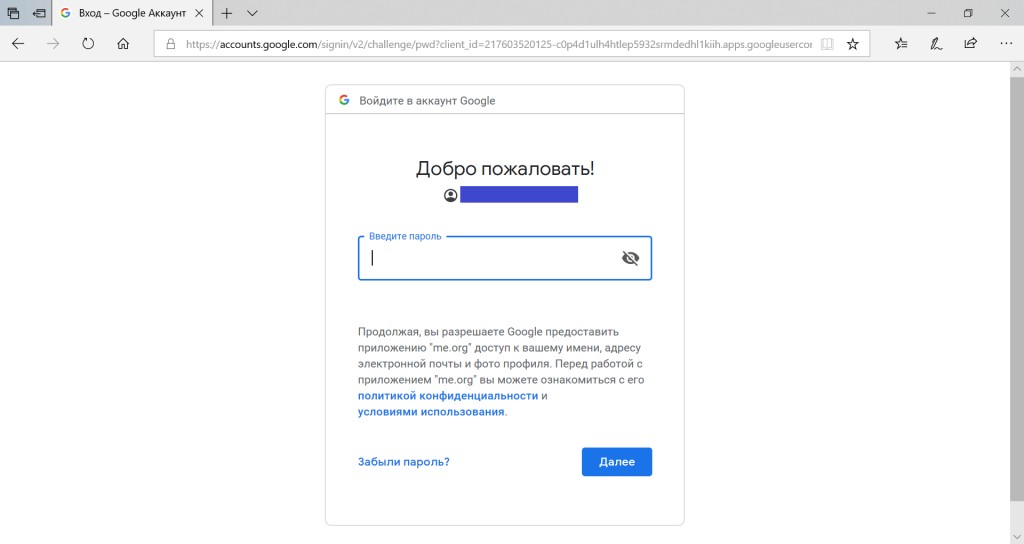
Spring Security の例として Google を使用して OAuth2 を設定する
OAuth2 を実装するとき、私はSpring のこの公式チュートリアルに依存しました。OAuth2 をサポートするには、次のライブラリを pom.xml に追加します。<dependency>
<groupId>org.springframework.security.oauth.boot</groupId>
<artifactId>spring-security-oauth2-autoconfigure</artifactId>
<version>2.0.0.RELEASE</version>
</dependency>SecurityConfig。まず、 @EnableOAuth2Client アノテーションを追加しましょう。ソーシャルネットワーク経由でログインするために必要なものが自動的に表示されます。
フィルター設定と application.properties
セキュリティ構成で使用する OAuth2ClientContext を挿入しましょう。@Autowired
private OAuth2ClientContext oAuth2ClientContext;FilterRegistrationBeanフィルターの優先順位を -100 に設定する を使用します。
@Bean
public FilterRegistrationBean oAuth2ClientFilterRegistration(OAuth2ClientContextFilter oAuth2ClientContextFilter)
{
  FilterRegistrationBean registration = new FilterRegistrationBean();
  registration.setFilter(oAuth2ClientContextFilter);
  registration.setOrder(-100);
  return registration;
}

private Filter ssoFilter()
{
  OAuth2ClientAuthenticationProcessingFilter googleFilter = new OAuth2ClientAuthenticationProcessingFilter("/login/google");
  OAuth2RestTemplate googleTemplate = new OAuth2RestTemplate(google(), oAuth2ClientContext);
  googleFilter.setRestTemplate(googleTemplate);
  CustomUserInfoTokenServices tokenServices = new CustomUserInfoTokenServices(googleResource().getUserInfoUri(), google().getClientId());
  tokenServices.setRestTemplate(googleTemplate);
  googleFilter.setTokenServices(tokenServices);
  tokenServices.setUserRepo(userRepo);
  tokenServices.setPasswordEncoder(passwordEncoder);
  return googleFilter;
}http.addFilterBefore(ssoFilter(), UsernamePasswordAuthenticationFilter.class);@Bean
@ConfigurationProperties("google.client")
public AuthorizationCodeResourceDetails google()
{
return new AuthorizationCodeResourceDetails();
}@Bean
@ConfigurationProperties("google.resource")
public ResourceServerProperties googleResource()
{
return new ResourceServerProperties();
}google.client.clientId=yourClientId
google.client.clientSecret=yourClientSecret
google.client.accessTokenUri=https://www.googleapis.com/oauth2/v4/token
google.client.userAuthorizationUri=https://accounts.google.com/o/oauth2/v2/auth
google.client.clientAuthenticationScheme=form
google.client.scope=openid,email,profile
google.resource.userInfoUri=https://www.googleapis.com/oauth2/v3/userinfo
google.resource.preferTokenInfo=trueGoogle Cloud Platformへのアプリケーションの登録のハイライト
パス: API とサービス -> 認証情報 OAuth アクセス要求ウィンドウ:- アプリケーション名: Spring ログイン フォームと OAuth2 チュートリアル
- サポートメールアドレス:あなたのメールアドレス
- Google API スコープ:電子メール、プロフィール、openid
- 承認済みドメイン: me.org
- アプリケーションのメイン ページへのリンク: http://me.org:8080
- アプリのプライバシー ポリシーへのリンク: http://me.org:8080
- アプリケーションの利用規約へのリンク: http://me.org:8080
- タイプ: Web アプリケーション
- タイトル: Spring ログイン フォームと OAuth2 チュートリアル
- 許可される JavaScript ソース: http://me.org、http://me.org:8080
- 許可されるリダイレクト URI: http://me.org:8080/login、http://me.org:8080/login/google
CustomUserInfoTokenServices
フィルター関数の説明に「カスタム」という単語があることに気づきましたか? クラスCustomUserInfoTokenServices。はい、ブラックジャックとユーザーをデータベースに保存する機能を備えた独自のクラスを作成します。IntelliJ IDEA で Ctrl-N キーボード ショートカットを使用すると、UserInfoTokenServicesデフォルトがどのように実装されているかを検索して確認できます。そのコードを新しく作成したクラスにコピーしましょうCustomUserInfoTokenServices。ほとんどは変更せずにそのままにしておくことができます。関数のロジックを変更する前に、UserRepoと をクラスのプライベート フィールドとして追加しましょうPasswordEncoder。それらのセッターを作成しましょう。@Autowired UserRepo userRepo を SecurityConfig クラスに追加しましょう。フィルタ作成メソッドのエラーへのポインタがどのように消えるかを見て、私たちは喜びます。@Autowired を CustomUserInfoTokenServices に直接適用できなかったのはなぜですか? このクラスは Spring アノテーションでマークされておらず、フィルターの宣言時にコンストラクターが明示的に作成されるため、依存関係を取得しません。したがって、Spring の DI メカニズムはそれについて知りません。このクラス内の何かに @Autowired アノテーションを付けると、使用時に NullPointerException が発生します。しかし、明示的なセッターを使用すると、すべてが非常にうまく機能します。必要なコンポーネントを実装した後、対象となる主なオブジェクトはloadAuthentication関数となり、ユーザーに関する情報を含む Map<String, Object> が取得されます。このプロジェクトでは、ソーシャル ネットワーク経由でログインしたユーザーをデータベースに保存する機能を実装しました。OAuth2 プロバイダーとして Google アカウントを使用しているため、マップに Google の一般的な「サブ」フィールドが含まれているかどうかを確認します。存在する場合、ユーザーに関する情報が正しく受信されたことを意味します。新しいユーザーを作成し、データベースに保存します。
@Override
public OAuth2Authentication loadAuthentication(String accessToken)
     throws AuthenticationException, InvalidTokenException
{
  Map<String, Object> map = getMap(this.userInfoEndpointUrl, accessToken);

  if(map.containsKey("sub"))
  {
     String googleName = (String) map.get("name");
     String googleUsername = (String) map.get("email");

     User user = userRepo.findByGoogleUsername(googleUsername);

     if(user == null)
     {
        user = new User();
        user.setActive(true);
        user.setRoles(Collections.singleton(Role.USER));
     }

     user.setName(googleName);
     user.setUsername(googleUsername);
     user.setGoogleName(googleName);
     user.setGoogleUsername(googleUsername);
     user.setPassword(passwordEncoder.encode("oauth2user"));

     userRepo.save(user);
  }

  if (map.containsKey("error"))
  {
     this.logger.debug("userinfo returned error: " + map.get("error"));
     throw new InvalidTokenException(accessToken);
  }
  return extractAuthentication(map);
}@GetMapping("/")
public String index(Principal principal)
{
if(principal != null)
{
return "redirect:/notes";
}
return "index";
}プロジェクトの最終始動
外観を若干変更し、終了ボタンを追加した後、プロジェクトの最終的な起動を実行します。


GO TO FULL VERSION