Instead of an introduction
Hello future Senior Software Engineer.Git Basics
Git is a distributed version control system for our code. Why do we need it? Distributed teams need some kind of work management system. Needed to track changes that occur over time. That is, step by step we see which files have changed and how. This is especially important when you analyze what was done within one task: this makes it possible to go back. Let's imagine a situation: there was a working code, everything was good in it, but we decided to improve something, tweak it here, tweak it there. Everything was fine, but this improvement broke half of the functionality and made it impossible to work. So, what is next? Without the Gita, one would have to sit for hours and remember how everything was originally. And so we just roll back to the commit and that’s it. Or what if there are two developers making their code changes at the same time? Without Git it looks like this: they copied the code from the original and did what they needed to do. The moment comes and both want to add their changes to the main folder. And what to do in this situation?.. I don’t even dare to estimate the time to do this work. There will be no such problems at all if you use Git.Installing Git
Let's install Git on your computer. I understand that everyone has different OS, so I will try to describe for several cases.Installation for Windows
As usual, you need to download the exe file and run it. Everything is simple here: click on the first Google link , install and that’s it. For work we will use the bash console that they provide. To work on Windows, you need to run Git Bash. This is what it looks like in the start menu: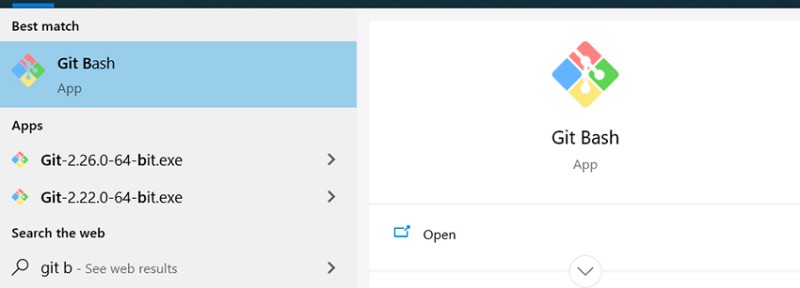 And this is already a console in which you can work. In order not to go to the folder with the project every time to open git there, you can right-click in the folder to open the console with the path we need:
Installation for Linux
Usually git is already installed and included in Linux distributions, since it is a tool originally written for developing the Linux kernel. But there are situations when it is not there. To check this, you need to open a terminal and type: git --version. If there is a clear answer, there is no need to install anything. Open a terminal and install. I work on Ubuntu, so I can tell you what to write for it: sudo apt-get install git. And that’s it: now you can use Git in any terminal.Installation on macOS
Here, too, first you need to check whether Git already exists (see above, as on Linux). If not, the easiest way is to download the latest version. If XCode is installed, then Git will definitely be automatically installed.Git setup
The git has a user setting from which the work will be carried out. This is a reasonable and necessary thing, because when a commit is created, Git takes exactly this information for the Author field. To set up a username and password for all projects, you need to enter the following commands:
git config --global user.name ”Ivan Ivanov”
git config --global user.email ivan.ivanov@gmail.com
git config user.name ”Ivan Ivanov”
git config user.email ivan.ivanov@gmail.com
A little theory...
To stay on topic, it is advisable to add a few new words and actions to your message... Otherwise there will be nothing to talk about. Of course, this is some jargon and a copy of English, so I will add meanings in English. What words and actions?
- git repository;
- commit (commit);
- branch;
- merge;
- conflicts;
- pull;
- push;
- how to ignore some files (.gitignore).
States in Git
The Gita has several states that need to be understood and remembered:- untracked;
- modified;
- prepared (staged);
- committed.
What does it mean?
These are the states in which the files from our code are located. That is, their life path usually looks like this:- A file that is created and not added to the repository will be in untracked state.
- We make changes to files that have already been added to the Git repository - they are in the modified state.
- From the files that we have changed, we select only those (or all) that we need (for example, we do not need compiled classes), and these classes with changes fall into the staged state.
- A commit is created from the prepared files from the staged state and goes into the Git repository. After this, the staged state is empty. But modified may still contain something.

What is a commit
A commit is the main object in version control. It contains all the changes since that commit. Commits are linked to each other like a singly linked list. Namely: There is the first commit. When a second commit is created, it (the second) knows that it comes after the first. And this way you can track the information. The commit also has its own information, so-called metadata:- a unique commit identifier by which you can find it;
- the name of the commit author who created it;
- commit creation date;
- a comment that describes what was done during this commit.

What is a branch
 A branch is a pointer to a commit. Since a commit knows which commit came before it, when a branch points to a commit, all those previous ones also refer to it. Based on this, we can say that there can be as many branches pointing to the same commit. Work happens on branches, so when a new commit is created, the branch moves its pointer to the newer commit.
Getting started with Git
You can work only with a local repository, or with a remote one. To work out the necessary commands, you can only use the local repository. It stores all information only locally in the project in the .git folder. If we talk about remote, then all the information is stored somewhere on a remote server: only a copy of the project is stored locally, changes to which can be pushed (git push) to the remote repository. Here and further we will discuss working with git in the console. Of course, you can use some graphical solutions (for example, in Intellij IDEA), but first you need to figure out what commands are happening and what they mean.Working with Git in a local repository
Next, I suggest you follow all the steps that I did while you read the article. This will improve your understanding and retention of the material. So bon appetit :) To create a local repository, you need to write:
git init This will create a .git folder in the location where the console is located. .git is a folder that stores all the information about the Git repository. There is no need to delete it ;) Next, files are added to this project, and their status becomes Untracked. To see what the current work status is, write:
git status We are in the master branch, and until we move to another, everything will remain that way. This way you can see which files have been changed but not yet added to the staged state. To add them to the staged state, you need to write git add. There may be several options here, for example:
- git add -A - add all files from the staged state;
- git add . — add all files from this folder and all internal ones. Essentially the same as the previous one;
- git add <filename> - adds only a specific file. Here you can use regular expressions to add according to some pattern. For example, git add *.java: this means that you only need to add files with the java extension.
git add *.txt
git status From this we can see that the regular expression worked correctly, and now test_resource.txt is in a staged state. And finally, the last stage (with a local repository, with a remote one there will be one more ;)) - commit and create a new commit:
git commit -m “all txt files were added to the project”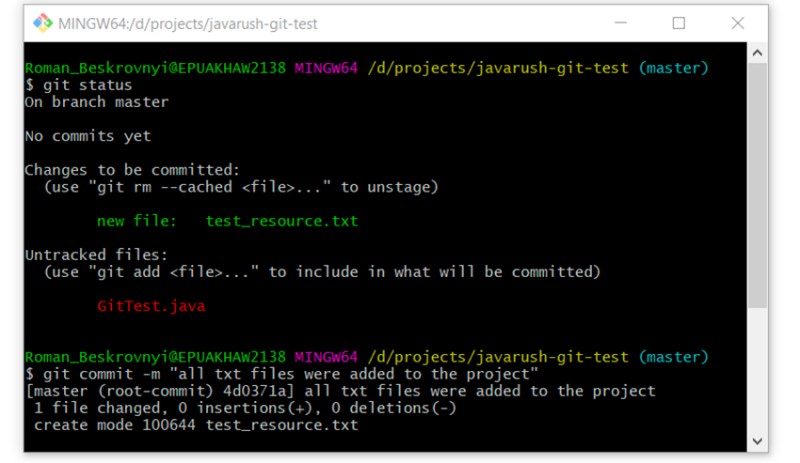 Next, there's a great command to look at the commit history of a branch. Let's use it:
git log Here you can already see that our first commit has appeared with the text that we transferred. It is very important to understand that the text we pass must define as accurately as possible what was done during this commit. This will help many times in the future. An inquisitive reader who has not yet fallen asleep may say: what happened to the GitTest.java file? Now we’ll find out, use for this:
git status As we can see, it remains in the untracked state and is waiting in the wings. Or maybe we don’t want to add it to the project at all? Sometimes it happens. Next, to make it more interesting, let's try to change our text file test_resource.txt. Let's add some text there and check the status:
git status Here you can clearly see the difference between the two states - untracked and modified. GitTest.java is in untracked state and test_resource.txt is in modified state. Now that there are already files in the modified state, we can look at the changes that have been made to them. This can be done using the command:
git diff That is, you can clearly see here that I added hello world! to our text file. Add changes to the text file and commit:
git add test_resource.txt
git commit -m “added hello word! to test_resource.txt”
git log As you can see, there are already two commits. In the same way we add GitTest.java. Now no comments, just commands:
git add GitTest.java
git commit -m “added GitTest.java”
git status
Working with .gitignore
It's clear that we only want to store the source code and nothing else in the repository. What else could it be? At a minimum, compiled classes and/or files that create development environments. In order for Git to ignore them, there is a special file that needs to be created. We do this: we create a file in the root of the project called .gitignore, and in this file each line will be a pattern to ignore. In this example, git ignore would look like this:
```
*.class
target/
*.iml
.idea/
```- the first line is to ignore all files with the .class extension;
- the second line is to ignore the target folder and everything it contains;
- the third line is to ignore all files with the .iml extension;
- The fourth line is to ignore the .idea folder.
git status Clearly, we don't want to accidentally (if we use git add -A) add a compiled class to the project. To do this, create a .gitignore file and add everything that was described earlier:
  Now let’s add git ignore to the project with a new commit:
git add .gitignore
git commit -m “added .gitignore file”
git status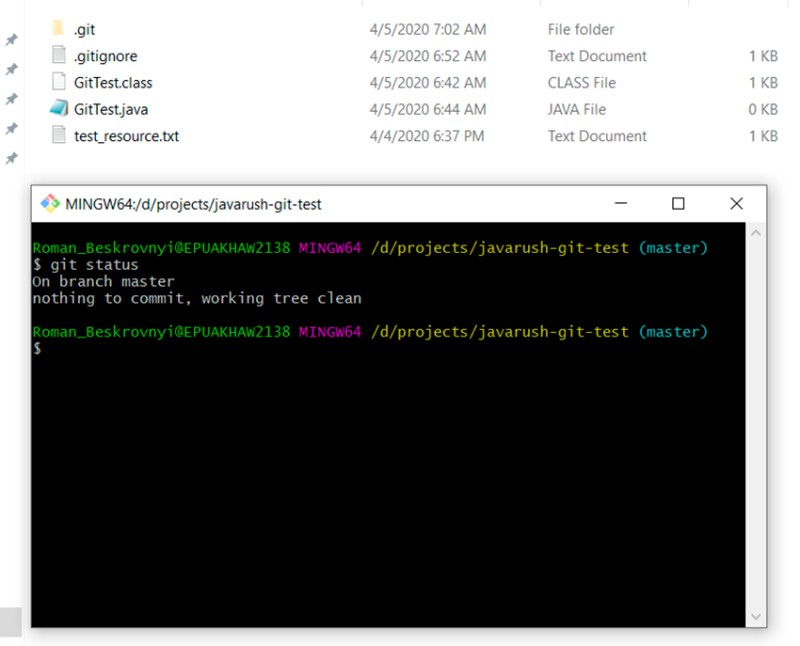 Everything is clear) Git ignore +1)
Working with branches and the like
Of course, working in one branch is inconvenient for one and impossible when there is more than one person in the team. There is a branch for this. As I said before, a branch is simply a moving pointer to commits. In this part, we will look at working in different branches: how to merge changes from one branch to another, what conflicts may arise, and much more. To see a list of all branches in the repository and understand which one you are on, you need to write:
git branch -a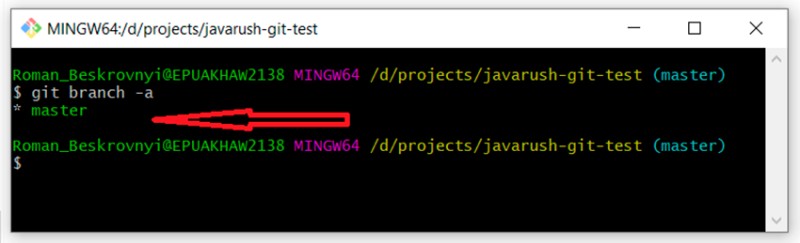 You can see that we only have one master branch, and the asterisk in front of it says that we are on it. By the way, to find out which branch we are on, we can also use the status check (git status). Next, there are several options for creating branches (maybe there are more, I use these):
- create a new branch based on the one we are on (99% of cases);
- create a branch based on a specific commit (1%).
Create a branch based on a specific commit
We will rely on the unique commit identifier. To find it, we write:
git log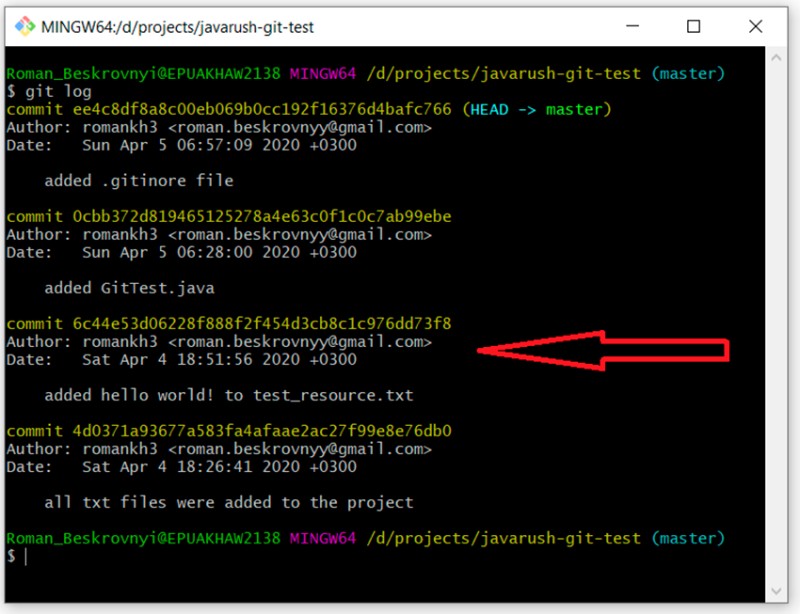 I highlighted the commit with the comment “added hello world...”. It has a unique identifier - “6c44e53d06228f888f2f454d3cb8c1c976dd73f8”. I want to create a development branch starting from this commit. For this I will write:
git checkout -b development 6c44e53d06228f888f2f454d3cb8c1c976dd73f8
git status
git log
And it’s true: it turned out that we have two commits. By the way, an interesting point: there is no .gitignore file in this branch yet, so our compiled file (GitTest.class) is now highlighted in the untracked state. Now we can revise our branches again by writing:
git branch -a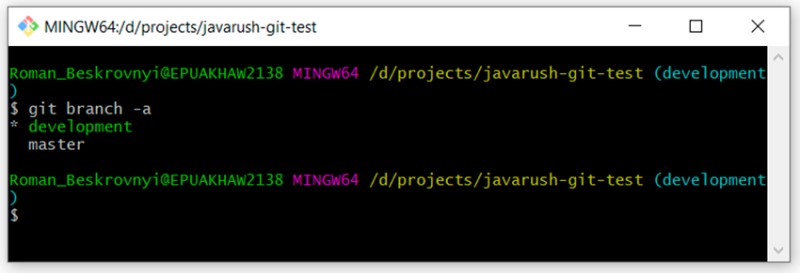 It can be seen that there are two branches - master and development - and now we are on development.
Create a branch based on the current one
The second way to create a branch is to build on another. I want to create a branch based on the master branch, so I need to switch to it first, and the next step is to create a new one. Let's look:- git checkout master - move to the master branch;
- git status - check if it is on the master.
 Here you can see that we have moved to the master branch, git ignore is already working here, and the compiled class no longer appears as untracked. Now we create a new branch based on the master branch:
git checkout -b feature/update-txt-files If you have any doubts that this branch will not be the same as master, you can easily check this by writing git log and looking at all the commits. There should be four of them.
Resolve conflicts
Before we understand what a conflict is, we need to talk about merging (merging) one branch into another. This picture can show the process when one branch is merged into another: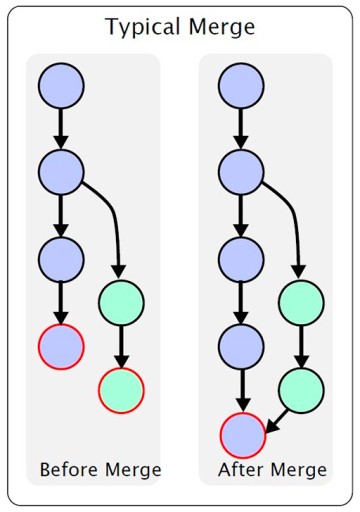 That is, there is a main branch. At some point, a secondary one is created from it, in which changes occur. Once the work is done, you need to merge one branch into another. I will not describe various features: I want to convey only understanding within the framework of this article, and you will find out the details yourself if necessary. So, in our example, we created the feature/update-txt-files branch. As it is written in the name of the branch, we will update the text.
  Now you need to create a new commit for this matter:
git add *.txt
git commit -m “updated txt files”
git log
Now, if we want to merge the feature/update-txt-files branch into master, we need to go to master and write git merge feature/update-txt-files:
git checkout master
git merge feature/update-txt-files
git log
As a result, now the master branch also has a commit that was added to feature/update-txt-files. This functionality is added so you can delete the feature branch. To do this we write:
git branch -D feature/update-txt-files
git checkout -b feature/add-header
... делаем изменения в файле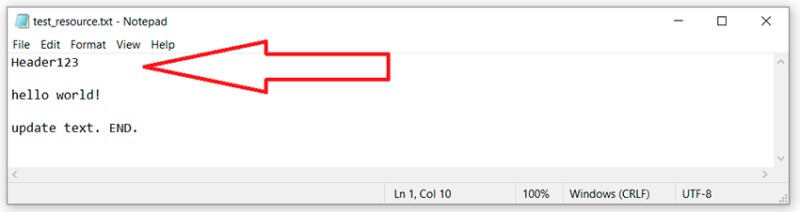
git add *.txt
git commit -m “added header to txt”
Go to the master branch and also update this text file on the same line as the feature branch:
git checkout master
… обновor test_resource.txt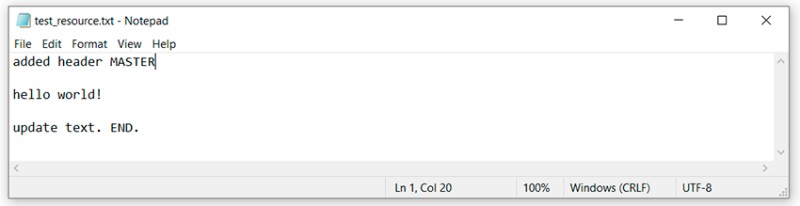
git add test_resource.txt
git commit -m “added master header to txt”
git merge feature/add-header And here we can see that Git could not independently decide how to merge this code and says that we must first resolve the conflict, and only then make a commit. Ok, let’s open the file containing the conflict in a text editor and see:
  To understand what git did here, you need to remember what we wrote where and compare:
- between “<<<<<<< HEAD” and “=======” are the master changes that were in this line in the master branch.
- between “=======” and “>>>>>>> feature/add-header” there are changes that were in the feature/add-header branch.
 Let's look at the status of the changes, the description will be slightly different. There will be no modified state, but Unmerged. So we could safely add a fifth state... But I think this is unnecessary, let’s see:
git status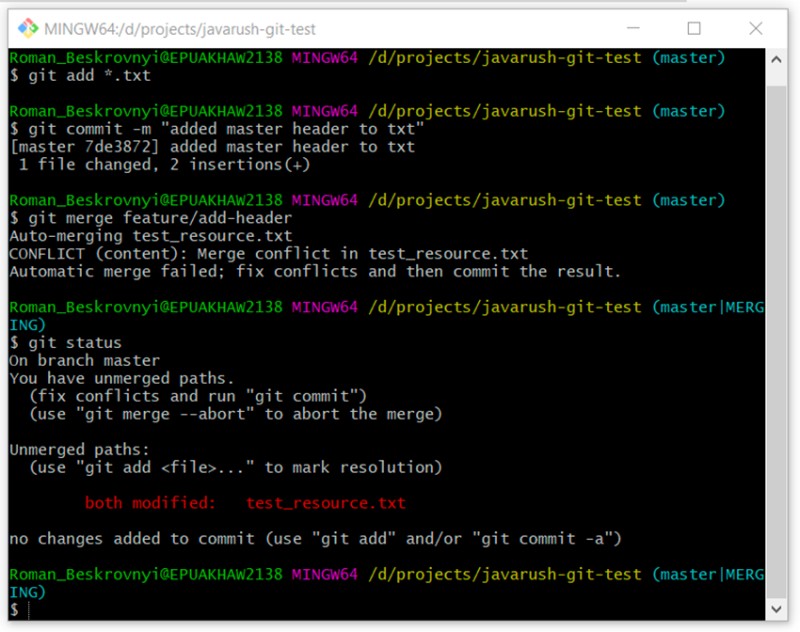 We were convinced that this was a different, unusual case. Let's continue:
git add *.txt In the description you will notice that they only suggest writing git commit. We listen and write:
git commit And that’s all: this is how we did it - we resolved the conflict in the console. Of course, in development environments you can do this a little easier, for example, in Intellij IDEA everything is set up so well that you can perform all the necessary actions in it. But the development environment does a lot of things under the hood, and we often don't understand what exactly happened there. And when there is no understanding, then problems can arise.
Working with remote repositories
The last step is to understand a few more commands that are needed to work with a remote repository. As I already said, a remote repository is some place where the repository is stored and from where you can clone it. What types of remote repositories are there? There are tons of examples:-
GitHub is the largest repository for repositories and collaborative development. I have already described it in previous articles.
Subscribe to my Github account . I often exhibit my work there in the areas that I study during my work. -
GitLab is an open source web- based DevOps lifecycle tool that provides a code repository management system for Git with its own wiki, issue tracking system , CI/CD pipeline and other features. After the news that Microsoft bought GitHub, some developers duplicated their work in GitLab.
-
BitBucket is a web service for hosting projects and their joint development, based on the Mercurial and Git version control system. At one time it had a big advantage over GitHub in that it had free private repositories. Last year, GitHub also made this feature available to everyone for free.
-
And so on…
git clone https://github.com/romankh3/git-demo
git pull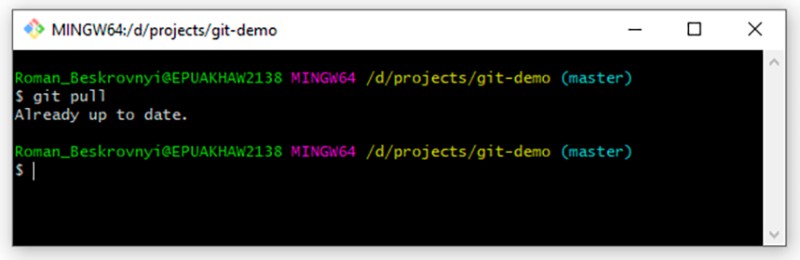 In our case, nothing has changed remotely now, so the answer is: Already up to date. But if I make some changes in the remote repository, the local one will be updated after we pull them. And finally, the last command is to push data to the remote repository. When we have done something locally and want to transfer it to a remote repository, we must first create a new commit locally. To do this, let’s add something else to our text file:
  Now it’s a common thing for us - we create a commit for this matter:
git add test_resource.txt
git commit -m “prepated txt for pushing”
git push That's all I wanted to tell you. Thank you for your attention. Subscribe to my GitHub account , where I post different cool example projects from what I study and use at work.
useful links
- The official document on Git is in Russian . I recommend it as a reference guide.
- Git
GO TO FULL VERSION